
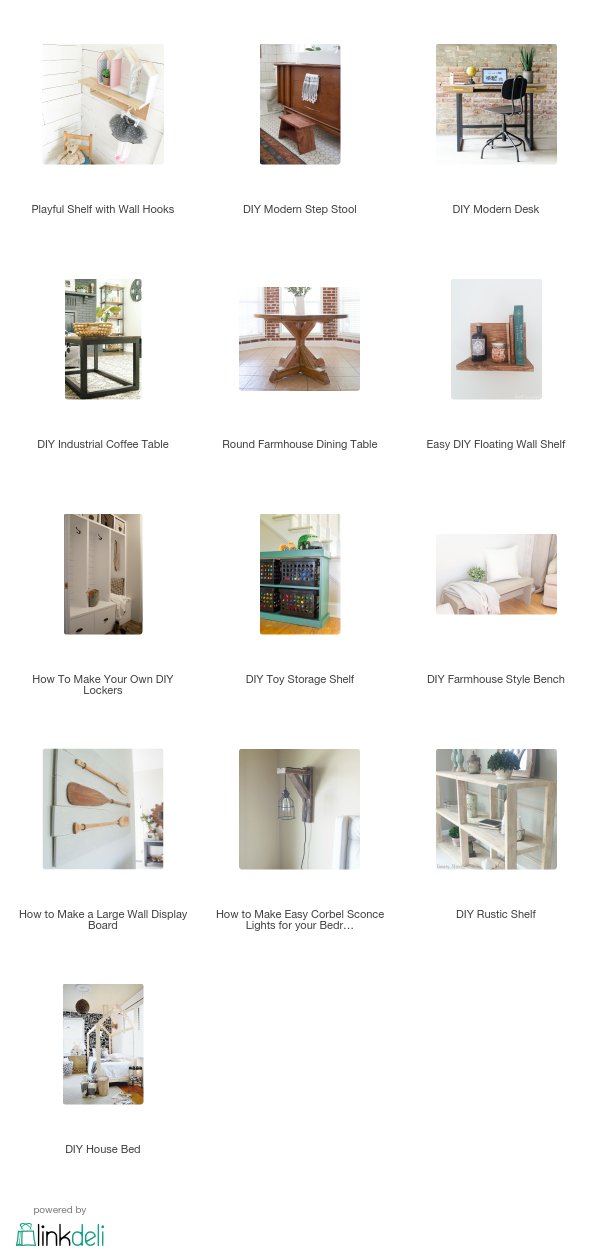
A mudroom is one of the most practical rooms in a home, and these DIY lockers make it so practical and functional… not to mention beautiful! 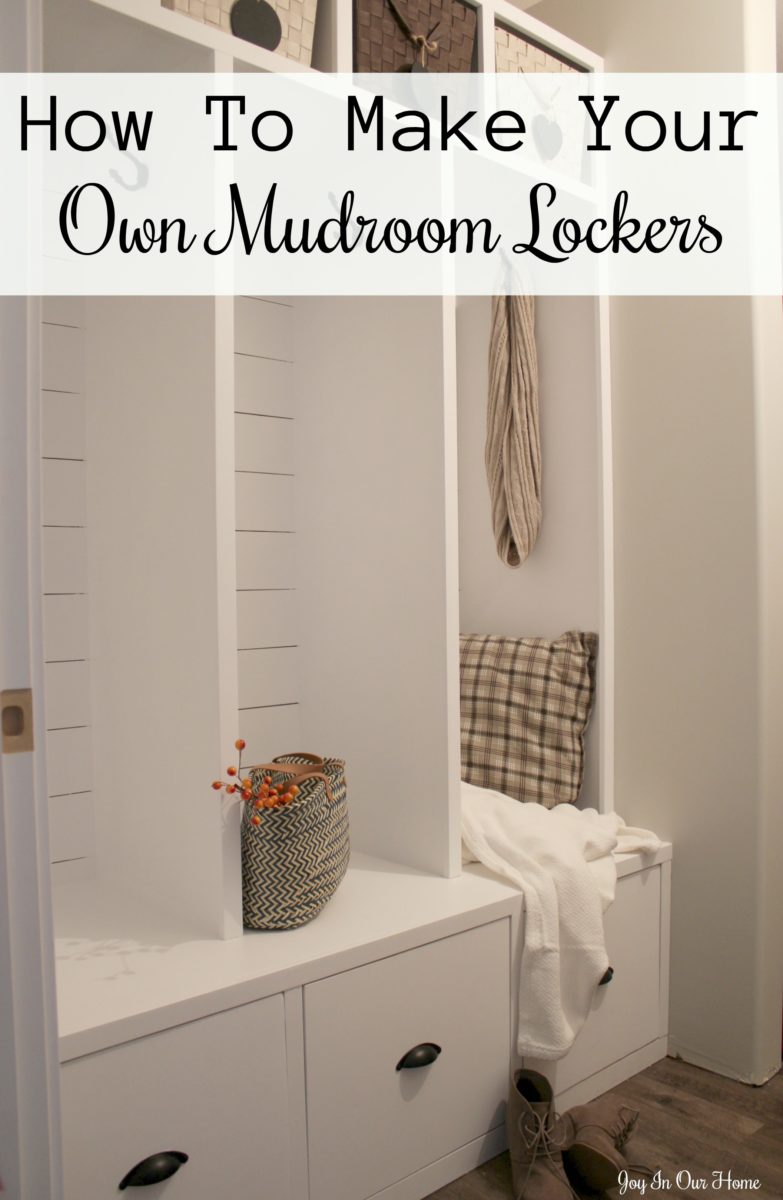
This post was sponsored by Kreg Jig and contains affiliate links. All opinions about this amazing product are totally mine own and I only share products that I use in our home and love! Please see my full disclosure and privacy policy here.)
As I was planning ahead and realized September’s Monthly DIY Challenge is all about working with the kreg jig my husband and I knew hands down what we were going to create with it! (And while we’re chatting about the Monthly DIY Challenge, this is a monthly challenge that a few of my blogging friends and I do each month. We usually use the same product and everyone creates something with it or we also do themed months. Here are some of our previous months if you want to have a peek … 1X2s, crates, stencils, dollar store items, paint sprayers, and upcyled material. Those are just a few of my favorites!
And back to the Kreg Jig! Friends, where was this tool when we first started diy-ing!! I’m telling you, it’ is amazing and we are giving away ten Kreg Jigs to our readers!! Be sure to enter the contest at the end of my post!!! I’d love for one (or 10!!!) of my readers to win!!!
We used to have lockers very similar to these but last year we had major water damage in our home and these were ripped out as they had been ruined. (We might’ve cried just a little bit when we saw them in the dumpster bins!) I don’t know what it’s like in your home, but backpacks, coats and shoes seem to get thrown right on the rug as soon as you step foot in the door. I’ve missed these lockers SO much and hands-down we knew these babies had to get rebuilt!
I realize not everyone has room for lockers in their home but the awesome thing about mudroom lockers is you can build them to suit any space in your home… big or small! Whether you can dedicate a big space in your laundry room or just a wall right inside your front door. I’m so excited to show you the ones my husband built using the kreg jig!!
As soon as we walk through the door after school, we each hang our hoodies, coats, backpacks, and purse in our “lockers”. I think they’re pretty much my favorite thing in our home! 😉
The space we had to place the lockers in was exactly five feet wide. Because of this size, it looked like we would have quite a bit of waste with our wood but it turned out pretty good since we could use the left over pieces of wood to build the drawers.
We decided to build the base of the lockers in the garage so . . . . . . .
2- 4X8 sheets of 1/2 inch plywood that was finished on both sides. Home Depot cut them down for us to three 5 foot strips by 24 inches which is the depth we wanted. These will become the top and bottom of the base of the locker unit. We then cut the sides and the bottom dividers. We wanted them 16 inches high so we cut 6 pieces that were 24″X16″. This is where the Kreg Jig comes in. In order to fasten the dividers in place, we used the Kreg Jig. Following the directions that were included with it, we drilled our holes. 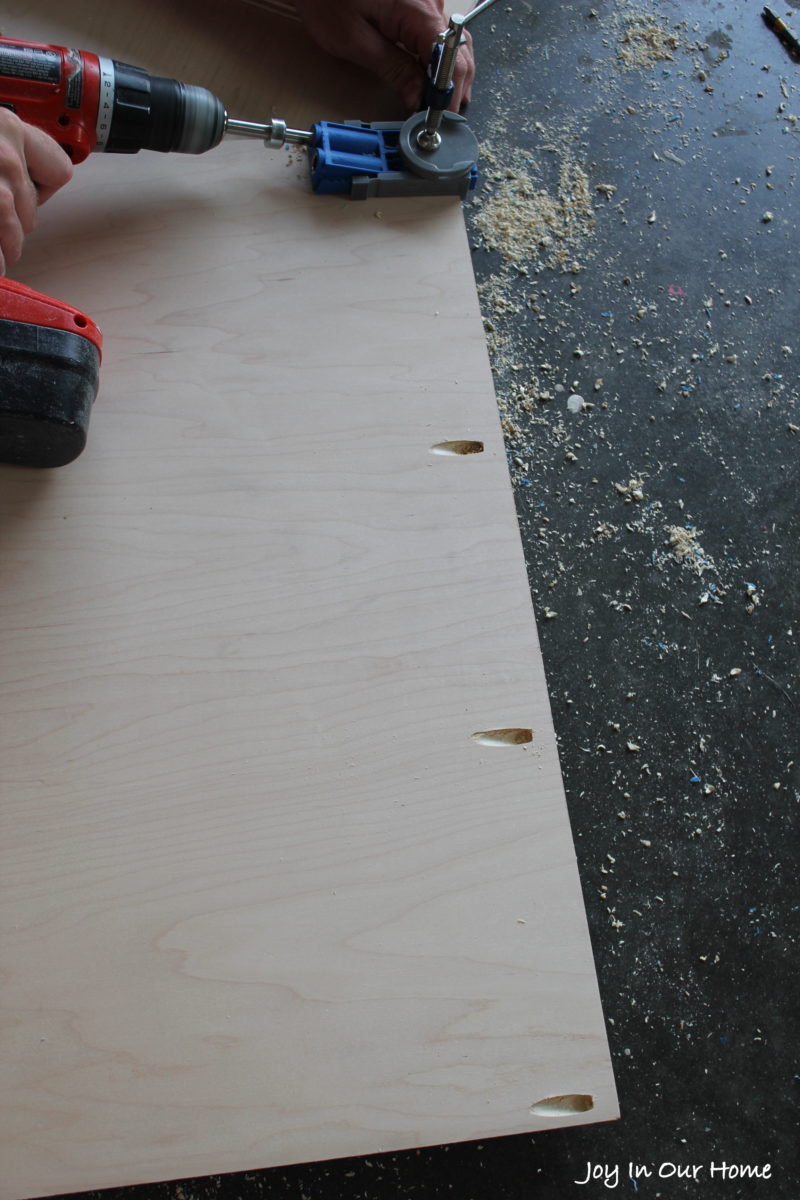 We didn’t have the Kreg clamp, but found a regular clamp held the jig in place while drilling. You will need a clamp of some sort so don’t try and skip this step. Once they were finished, we screwed the end pieces in place with Kreg Jig screws. Then we divided the center piece into three sections as we wanted to have three lockers and drawers.
 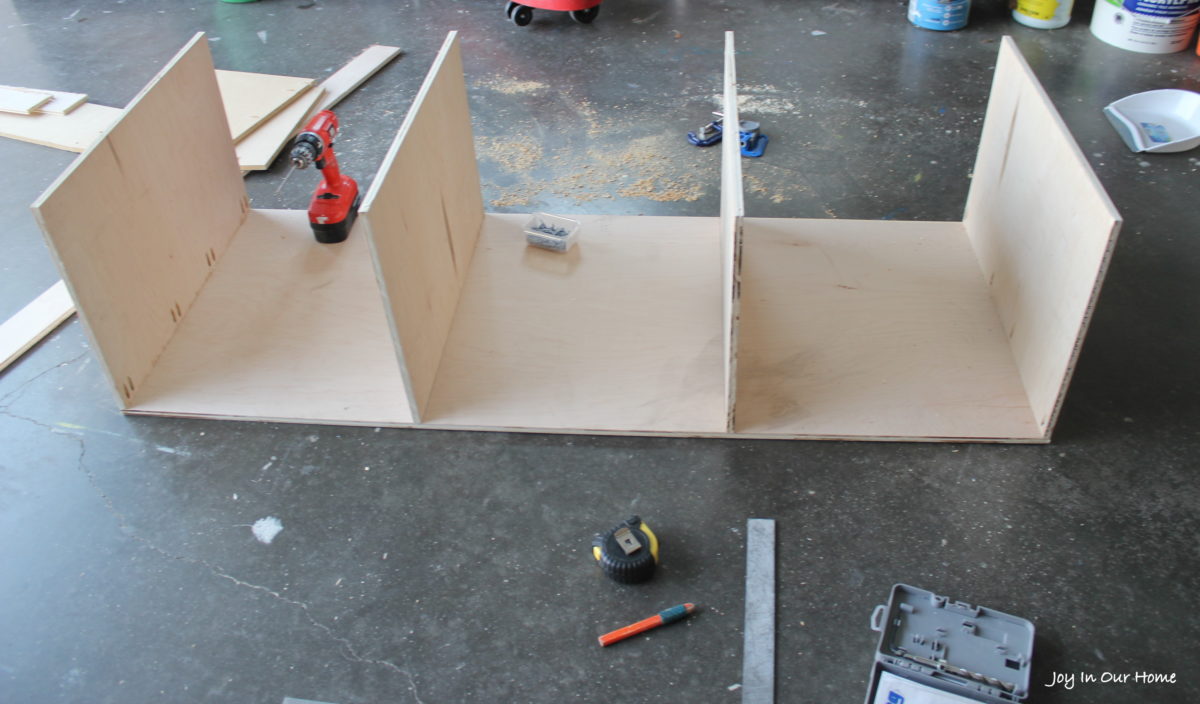 Lining up with a square, we then placed the drawer dividers in place. The two pieces that were left over then were attached beside the existing two center dividers to provide additional strength to the unit. We then added the pre cut top piece and the base of the locker unit was finished (except for the drawers!).
We screwed two 2X4’s to the floor in the laundry room to set the base unit on so that it is up off the floor and the drawers would have ample clearance. We then placed the base unit on and screwed it down. We fastened the third piece of precut plywood to the top of the base unit to make it a total of 1 inch thick and to provide additional support to the structure.
For the lockers themselves, we used 2-4X8 sheets of half inch MDF wood. Again, we had Home Depot rip them down to the size we needed which we decided was 18″wide by 56″ high. Again, it seemed like we would be wasting some of the wood, but we could utilize the leftovers for the drawers again. We had six of these cut and placed one on each end. We then added a piece to the top which was 18″ wide but the 5′ wide. We used the Kreg Jig to fasten these at the bottom and the top. Once the top piece was in place, we then doubled the remaining ones to make two one inch dividers, much like the drawer dividers. We used the Kreg Jig to fasten these at both the bottom and the top as well.
We wanted a spot for baskets and to change up the pattern, we decided to make four spaces. We cut six more strips that were 18″ deep by 11″ high. We screwed one on each end and the fastened another piece that was 18″ deep by the full five feet wide to the top. We used the Kreg Jig again to screw these in place and then added the center dividers. We didn’t double these ones since they didn’t need the additional support. 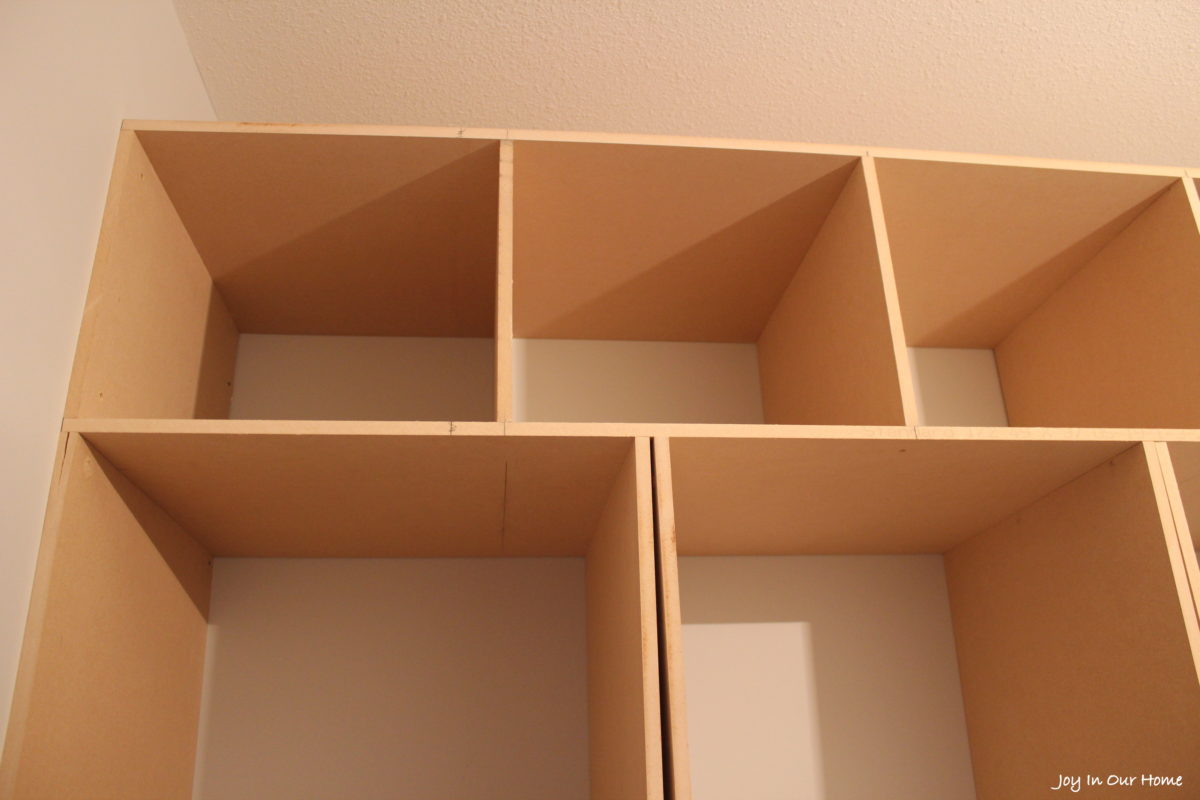
Once the main shell of the locker unit was in place, we sat back and admired it . . . and built the drawers! There was enough plywood left over for the bases of the drawers and then we used the left over MDF for the sides, front, and back of the drawers. We used drawer slides and allowed a 1/2 inch space for the slides when building the drawers.
Once the drawers were in place and we had a bit of wood left, I suggested to my husband it would be perfect to use for shiplap on the back of each locker. 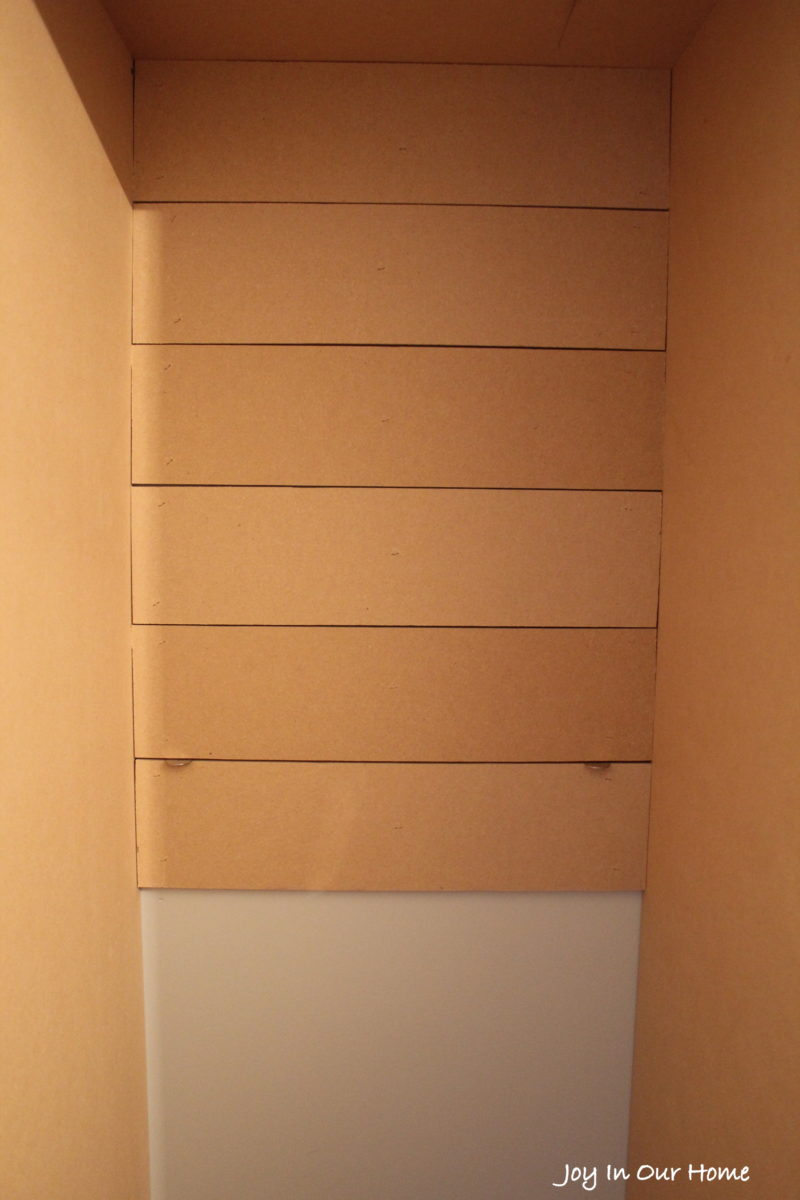
He cut each piece of MDF wood 5″ high and wide enough to fit each locker. Using a quarter he spaced them one below the other and so on.
Once they were completed, we added 1 3/8″ trim to all the front facing pieces. It was an extra $30 but we didn’t add the trim though our previous lockers and I think it looks so much better and finished with the trim! Using wood filler we filled all the screw holes and after sanding them, we pained them white.
Hope these plans help you create your own functional space in our own home!
As always, I’m so glad you stopped by today! Be sure to check out all the other amazing things my friends built with their kreg jig! 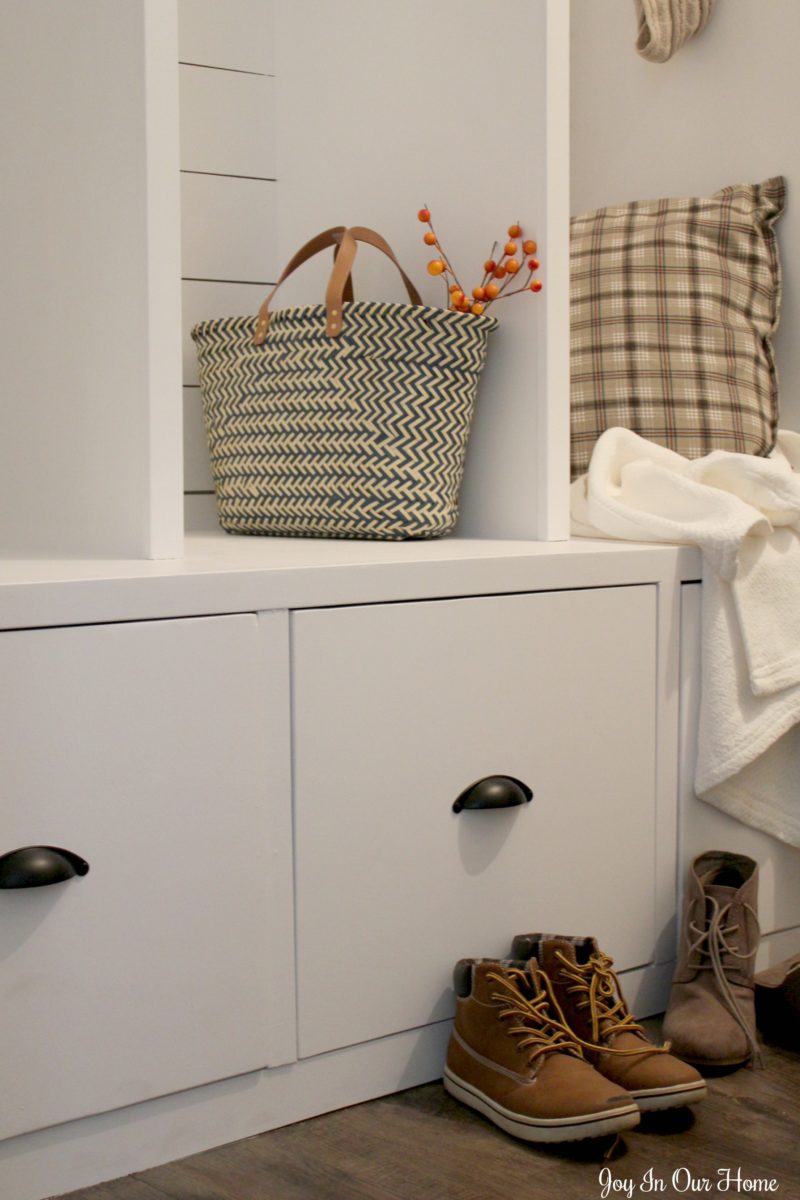
And good luck in the giveaway!!!

Wow Kendra, this is really beautiful!! You did a great job!!
Thank you so much, Leigh Anne! Appreciate your comments so much! xo
Oh my gosh! I can’t believe you MADE these!!! They’re incredible!!! And I especially LOVE the shiplap backing!
You know how to make a girl feel good! Even though I hardly did any of this work! Thank you SO much, Kristi! xo
It has to feel so good to have this organized space back after having to rip it out from the water damage! The lockers look great.
Thank you, friend! It really does feel SO good! Whenever I walk by I peek in there and so glad the disorganized mess is gone! xo
These turned out beautiful, Kendra!! I love lockers like these in mudrooms, they’re so handy! 🙂
Thanks, Amanda! They really are soo handy! Perfect for the kids to put all their stuff (and for Mama too! 😉
Your new lockers look fantastic, Kendra! You guys did an awesome job!
Thanks so much, Amy! We love having them again! Thanks for stopping by! xo
I want to add some new shelving in my kitchen, so this would come in very handy. Good luck everyone and thank you for the opportunity to win!
The kreg jig would be perfect to use for shelves! Thank you for stopping by!
These turned out so amazing! Such an awesome project, Kendra!
Thank you, Bre! Your comments always mean so much to me!
That’s an amazing tool! Love the lockers! Nice job!
Thanks so much, Johanna! The kreg jig definitely made the project so much easier! Appreciate your sweet comments!
Wow! Way to go, Kendra! I love your new mudroom lockers!
Thank you so much, Bre!! xo
We just finished a basement renovation which includes a mudroom space, that is still unfinished. I would make mudroom lockers similar to these for the space!
I know you’ll love the lockers, Mary! Good luck building yours!
Your mudroom lockers look amazing!
We have them in our house too and find them to be so useful. Much better than a closet!
I hear about the Kreg Jig all the time. One of these days I’m going to try it.
Thanks so much, Stacey! I agree, our lockers are so much more functional than a closet! I think once you have them you can’t be without them! So glad you stopped by! xo